
How many times have you heard that? Well stop throwing away your lampshades. You can actually spruce it up! There is this thing called "D.I.Y." which means Do It Yourself! And you can! All you need to be a true DIYer is an idea, some money, and a handful of smiles!
Please enjoy my tutorial. You'll note my skill and finesse in taking clear photos that really shows you what to do every step of the way. This method is for embroidering directly onto the lampshade. A lot of other tutorials want you to like take apart the shade, measure some fabric, stitch on the fabric, omg I'm so bored. Who has time for that?
Step one:
Ugh, think about what design you want to use to decorate that ugly stupid boring lampshade. I chose a paper crane from Urban Threads. Now print it out the size you want it. Print it out in multiple sizes if you want to throw caution to the wind, you rebel.
Step two:
Now tape the design INSIDE the lampshade. You'll note the skillful way in which I cut out the design:

Take a water soluble fabric marker (this will work) and trace the design on the outside of the lampshade. If you make a mistake it's ok because you'll be able to dissolve the ink with some cool water. You'll note my fine attention to making straight lines:

Step four:
This can go a couple ways. If you have thumbs of steel or your lampshade is just made out of something stupid thin, you can just go ahead and start stitching it up and you are done. But that's dumb. So what you will actually do is poke holes using a push-pin or paper-piercer all along the design. I poked from the outside in, because you'll get that bit of plastic sticking out from the exit wound. So if you push from the front the exit wound will be on the inside and make this whole thing less ugly.
How far apart you place the holes is up to you - it really depends on how big you want the stitches to be. Because I am a rogue with a devil-may-care attitude, the holes I poked are varying distances apart.

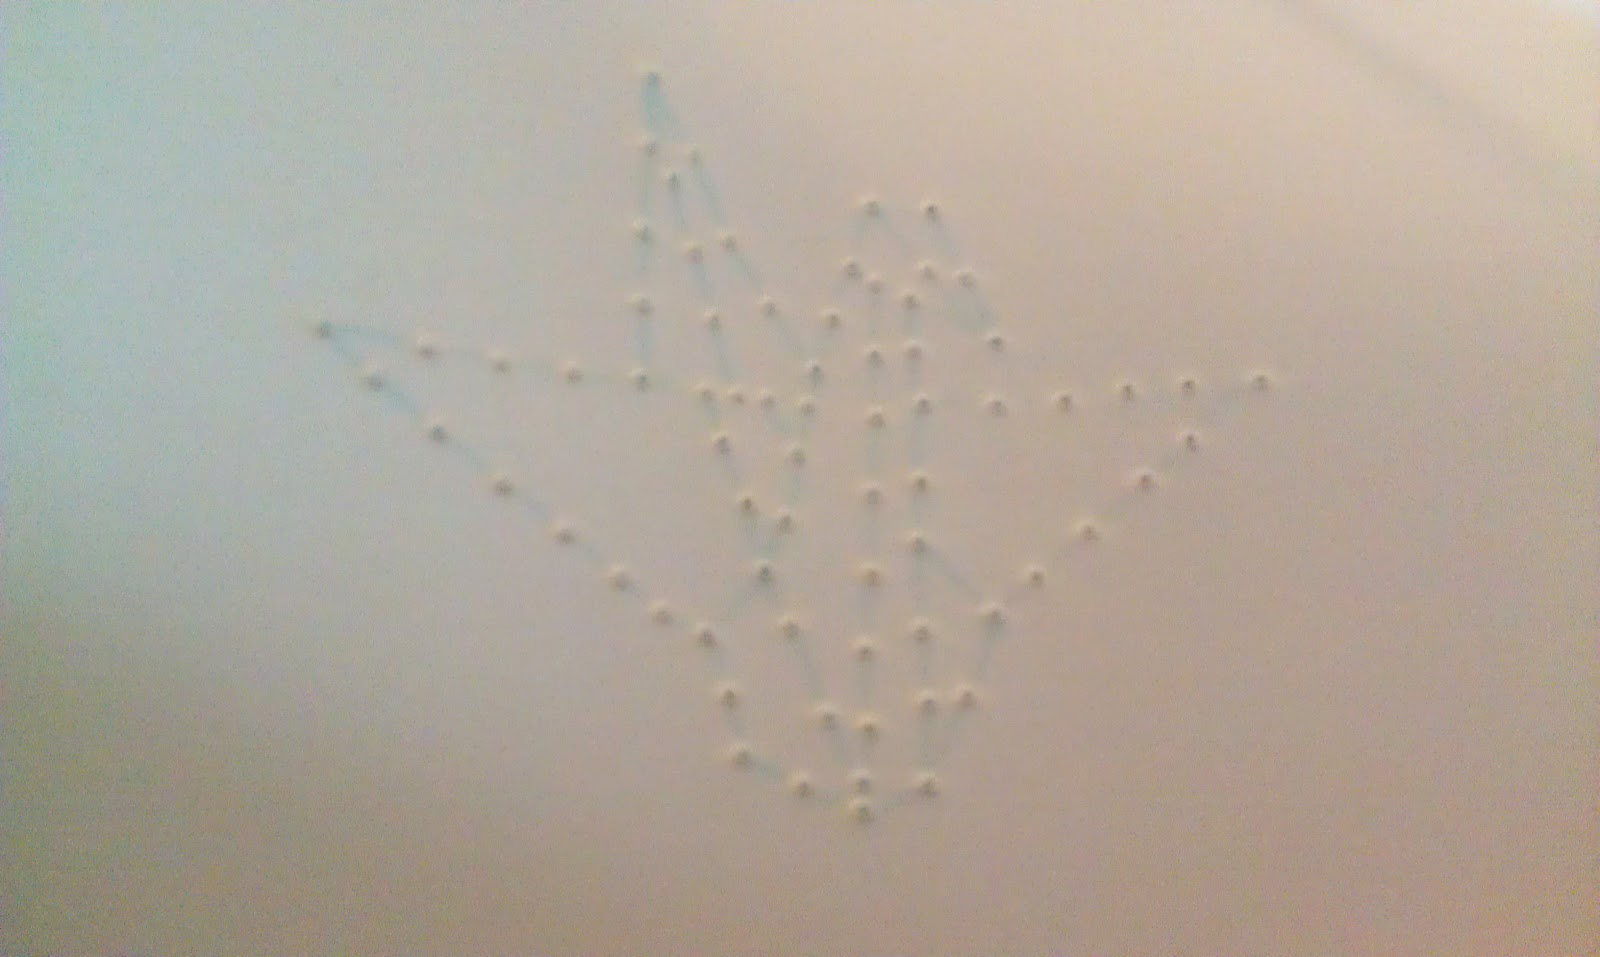
Stitch! I used a simple back stitch on the whole thing. I also don't care about "traveling threads" too much, but obviously you may want to depending on your design since you'll be able to see through the shade with the light on. The crane design is a little more forgiving for that though.
Step six:
Once you have stitched everything, go ahead and put it on your lamp! Now notice that you actually did everything upside down and now you can't put it on the lamp you wanted to. True story, bro. Measure once, cut twice!
 |
| Oh no, traveling threads! Also that dark gray streak is from when accidentally dented it because I can't have nice things. I was cautious not to make it worse when piercing and stitching. So there was that at least. |
 |
| Clearly not the right shade for this lamp because the base is huge. The drum shade was supposed to go on a little tripod lamp. |
 |
| Both sides. |
A+++ would try again!
Very nicely written. Had me laughing the whole way through. Also, though, neat idea. I will be doing this soon!
ReplyDeletexoxo
Now you have activated my curiosity towards this embroidery thing again, Nicole! Hmmm...
ReplyDeleteAnd I am certainly going to travel a lot these next few months, so perhaps it could be nice to bring something other than that darn work computer ;-)
*more thinking*
Thank you for a lovely time
Very very beautiful ! Color combos are good. I find very difficult to work with silk threads . For me it always gets tangled and it irritates me a lot. But u r very comfortable with silk thread. Isn't it?
ReplyDelete